【第27回】AmazonS3へSpringCloudAWSを使ってアクセスするアプリケーション実装(3)
クラウド上のストレージとして、AWSで利用可能なAmazon S3。今回以降はSpring Cloud AWSを用いてAmazon S3へアクセスするSpringアプリケーションの実装方法について解説します。
- Amazon S3の概要とバケットの作成・ファイルのアップロード
- Spring Cloud AWSを用いたアプリケーション実装(1)
- Spring Cloud AWSを用いたアプリケーション実装(2)
前回、 Spring Cloud AWSを使ったS3アクセスアプリケーション(1) に引き続き、 Spring Cloud AWSでS3へアクセスするアプリケーションを実装しています。
Spring Cloud AWSを使ったS3アクセスアプリケーション(2)
アプリケーションコンポーネントの実装に移ります。Controllerでは、以下3種類の処理を実装します。
- S3のバケット内にアップロードしている画像ファイル「sample.jpg」を取得し、MediaType.IMAGE_JPEG_VALUEとして、画像データをレスポンスとして返却する処理※
- S3のバケット内にアップロードしているテキストファイル「test.txt」を取得し、中身の文字列をレスポンスとして返却する処理
- 画面からアップロードされたマルチパート形式のファイルをS3バケットに保存し、「uploadResult.html」へリダイレクトする処理
※今回は比較的小さいファイルサイズの画像を扱うことを想定して、Controllerから取得する例を実装しています。 なお、リクエストマッピング実装の要領については TERASOLUNAガイドライン リクエストとハンドラメソッドのマッピング方法 も適宜参考にしてください。
package org.debugroom.mynavi.sample.aws.s3.app.web;

import java.awt.image.BufferedImage;
// omit

import org.springframework.http.HttpStatus;
import org.springframework.http.MediaType;
import org.springframework.http.ResponseEntity;
import org.springframework.stereotype.Controller;
import org.springframework.web.bind.annotation.GetMapping;
import org.springframework.web.bind.annotation.PostMapping;
import org.springframework.web.bind.annotation.ResponseBody;

@Controller
public class SampleController {

    @Autowired
    S3DownloadHelper s3DownloadHelper;

    @Autowired
    S3UploadHelper s3UploadHelper;

    // omit

    @GetMapping(value = "/image",
         headers = "Accept=image/jpeg, image/jpg, image/png, image/gif",
         produces = {MediaType.IMAGE_JPEG_VALUE, MediaType.IMAGE_PNG_VALUE, MediaType.IMAGE_GIF_VALUE})
    @ResponseBody
    public ResponseEntity<BufferedImage> getImage(){
        return ResponseEntity.ok().body(
             s3DownloadHelper.getImage("sample.jpg"));
    }

    @GetMapping("getTextFileBody")
    @ResponseBody
    public ResponseEntity<String> getTextFileBody(){
        return ResponseEntity.ok().body(
             s3DownloadHelper.getTextFileBody("test.txt"));
    }

    @PostMapping("upload")
    public String upload(FileUploadForm fileUploadModel){
        s3UploadHelper.saveFile(fileUploadModel.getUploadFile());
        return "redirect:/uploadResult.html";
    }

    // omit

}
Controllerから呼び出すS3でダウンロード、アップロードを行う処理をHelperとして実装します。 ダウンロード処理では、org.springframework.core.io.ResourceLoaderで、 S3のバケットプレフィックスを指定してオブジェクトキーを指定し、InputStreamとして読み込みを行います。 なお、画像ファイルの場合はデータ型としてjava.awt.image.BufferedImageを使用し、テキストデータなどの場合は、org.apache.commons.io.IOUtilsなどのユーティリティライブラリを使ってストリームデータをString型へ変換します。
package org.debugroom.mynavi.sample.aws.s3.app.web.helper;

import javax.imageio.ImageIO;
import java.awt.image.BufferedImage;
import java.io.IOException;
import java.io.InputStream;

import org.apache.commons.io.IOUtils;

import org.springframework.beans.factory.annotation.Autowired;
import org.springframework.beans.factory.annotation.Value;
import org.springframework.core.io.Resource;
import org.springframework.core.io.ResourceLoader;
import org.springframework.stereotype.Component;

@Component
public class S3DownloadHelper{

    private static final String S3_BUCKET_PREFIX = "s3://";
    private static final String DIRECTORY_DELIMITER = "/";

    @Value("${bucket.name}")
    private String bucketName;

    @Autowired
    ResourceLoader resourceLoader;

    public BufferedImage getImage(String imageFilePath){
        Resource resource = resourceLoader.getResource(
          new StringBuilder()
          .append(S3_BUCKET_PREFIX)
          .append(bucketName)
          .append(DIRECTORY_DELIMITER)
          .append(imageFilePath)
          .toString());
        BufferedImage image = null;
        try(InputStream inputStream = resource.getInputStream()){
            image = ImageIO.read(inputStream);
        }catch (IOException e){
            e.printStackTrace();
        }
        return image;
    }

    public String getTextFileBody(String textFilePath){
        Resource resource = resourceLoader.getResource(
          new StringBuilder()
          .append(S3_BUCKET_PREFIX)
          .append(bucketName)
          .append(DIRECTORY_DELIMITER)
          .append(textFilePath)
          .toString());
        String textBody = null;
        try(InputStream inputStream = resource.getInputStream()){
            textBody = IOUtils.toString(inputStream, "UTF-8");
        }catch (IOException e){
            e.printStackTrace();
        }
        return textBody;
    }
}
アップロード処理は同じくResourceLoaderを経由して、S3のバケットプレフィックスを保存したいオブジェクトキーと組み合わせ、 WritableResourceとして取得し、OutputStreamにデータを保存します。また、バケット上のディレクトリを含めた、 オブジェクキーのデータが存在するかどうかResourcePatternResolverを使って検索ができますが、 ディレクトリの作成やデータの削除などの処理はSDKのライブラリとして提供されているcom.amazonaws.services.s3.AmazonS3を使って直接操作を行う必要があります。
package org.debugroom.mynavi.sample.aws.s3.app.web.helper;

// omit

import com.amazonaws.services.s3.AmazonS3;
import com.amazonaws.services.s3.model.ObjectMetadata;
import com.amazonaws.services.s3.model.PutObjectRequest;

import org.apache.commons.io.IOUtils;

import org.springframework.beans.factory.annotation.Autowired;
import org.springframework.beans.factory.annotation.Value;
import org.springframework.core.io.Resource;
import org.springframework.core.io.ResourceLoader;
import org.springframework.core.io.WritableResource;
import org.springframework.core.io.support.ResourcePatternResolver;
import org.springframework.stereotype.Component;
import org.springframework.web.multipart.MultipartFile;

@Component
public class S3UploadHelper{

    private static final String S3_BUCKET_PREFIX = "s3://";
    private static final String DIRECTORY_DELIMITER = "/";

    @Value("${bucket.name}")
    private String bucketName;

    @Autowired
    ResourceLoader resourceLoader;

    @Autowired
    ResourcePatternResolver resourcePatternResolver;

    @Autowired
    AmazonS3 amazonS3;

    public String saveFile(MultipartFile multipartFile){
        String objectKey = new StringBuilder()
          .append(S3_BUCKET_PREFIX)
          .append(bucketName)
          .append(DIRECTORY_DELIMITER)
          .append(multipartFile.getOriginalFilename())
          .toString();
        WritableResource writableResource = (WritableResource)resourceLoader.getResource(objectKey);
        try(InputStream inputStream = multipartFile.getInputStream();
                OutputStream outputStream = writableResource.getOutputStream()){
            IOUtils.copy(inputStream, outputStream);
        }catch (IOException e){
            e.printStackTrace();
        }
        return objectKey;
     }

    public boolean existsDirectory(String directoryPath){
        try{
            List<Resource> resourceList = Arrays.asList(
              resourcePatternResolver.getResources(directoryPath + "/**"));
            if (resourceList.size() == 0){
                return false;
            }
        }catch (IOException e){
            e.printStackTrace();
        }
        return true;
    }

    public void createDirectory(String directoryPath){
        ObjectMetadata objectMetadata = new ObjectMetadata();
        try(InputStream emptyContent = new ByteArrayInputStream(new byte[0]);){
            PutObjectRequest putObjectRequest = new PutObjectRequest(
                bucketName, directoryPath, emptyContent, objectMetadata);
            amazonS3.putObject(putObjectRequest);
    }catch (IOException e){
        e.printStackTrace();;
    }
}
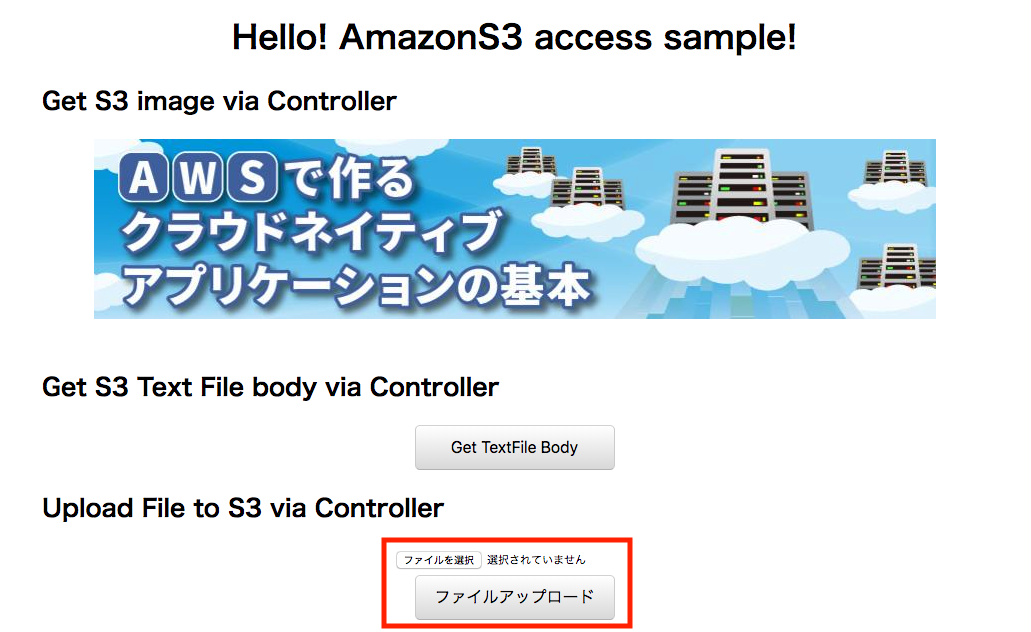
実装が完了したら、画面を作成し、実際に画像がダウンロードされるかを確認し、アップロード処理を実行してみましょう。 今回アップロードしていた「sample.jpg」は当連載のバナー画像であり、「test.txt」をアップロードして、 「Get TextFile Body」ボタンを押して、その内容を取得してみます。
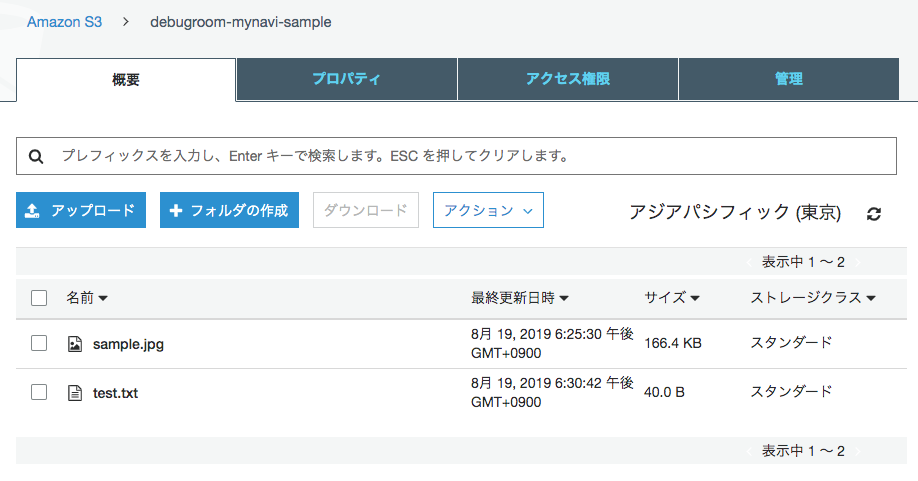
ファイルがアップロードされていることが確認できます。
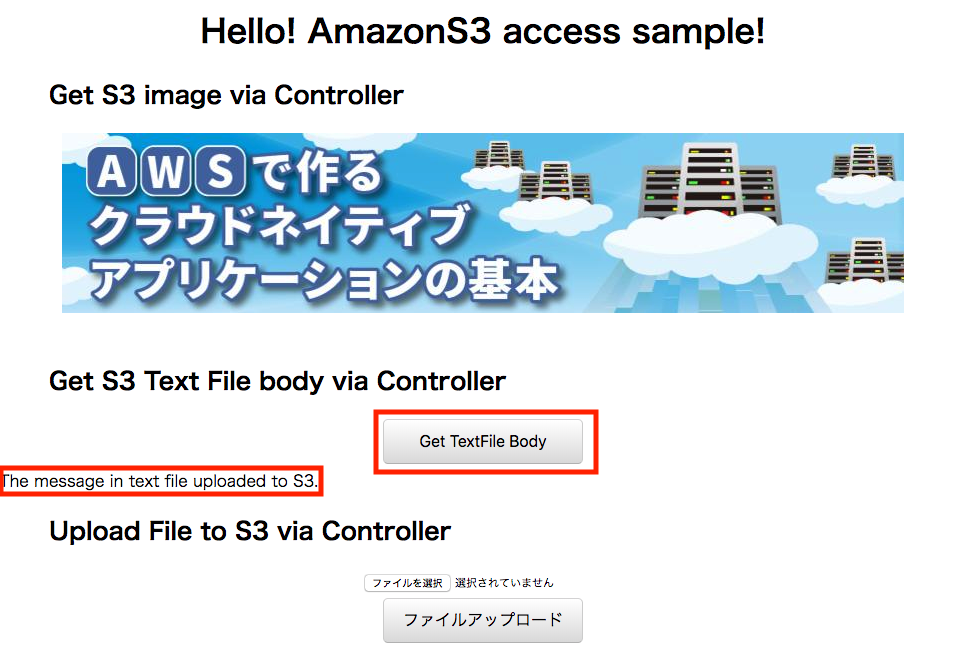
アップロードしたファイルの中身を取得し、表示します。
このように、S3にアクセスしてダウンロード・アップロードするアプリケーションをSpring Cloud AWSを用いて簡単に実装することができます。 AWS上に構築するクラウドネイティブなアプリケーションは、データ保存にS3を利用することで、可用性・信頼性が高い構成が可能です。 なお、署名つきURLや、一時認証情報を使って、クライアントからS3に直接ファイルをダウンロード・アップロードする方法については、 今回GitHub上にサンプル実装していますが、AWS上のIAMアクセスロール設定やサーバ側のアプリケーション実装が複雑で基本の範疇を越えるため、 詳細な解説は発展編へ譲りたいと思います。
次回は、基本編の最終になりますが、AmazonSQSを使ったSpringアプリケーション(オンライン・バッチ)の実装方法を解説します。
著者紹介
川畑 光平(KAWABATA Kohei)

某システムインテグレータにて、金融機関システム業務アプリケーション開発・システム基盤担当を経て、現在はソフトウェア開発自動化関連の研究開発・推進に従事。
Red Hat Certified Engineer、Pivotal Certified Spring Professional、AWS Certified Solutions Architect Professional等の資格を持ち、アプリケーション基盤・クラウドなど様々な開発プロジェクト支援にも携わる。
2019 APN AWS Top Engineers & Ambassadors 選出。
本連載記事の内容に対するご意見・ご質問は Facebook まで。