【第7回】Webアプリケーションからマイクロサービスを呼び出す実装(2)
本連載では、以下に示すようなマイクロサービスアーキテクチャのアプリケーション環境を構築しています。

前回は第3・4回で作成したWebアプリケーション内で、バックエンドのマイクロサービスを呼び出す処理を実装しました。 今回は、取得したユーザリソースを使って認証処理を行うようアプリケーションを修正してみます。 なお、本連載で実際に作成するアプリケーションでは GitHub 上にコミットしています。 以降に記載するソースコードでは、import文など本質的でない記述を省略している部分があるので、実行コードを作成する際は、必要に応じて適宜GitHubにあるソースコードも参照してください。
Spring Securityを使ったWebアプリケーションの修正(2)
第4回で実装したCustomUserDetailsServiceから前回実装したOrchestrationServiceを呼び出すように変更します。 以前の実装はコメントアウトしています。UserResourceを取得して、プロパティisAdminの値に応じて、設定するGrantedAuthorityを変更します。
package org.debugroom.mynavi.sample.aws.microservice.frontend.webapp.app.web.security;

import org.debugroom.mynavi.sample.aws.microservice.common.apinfra.exception.BusinessException;
import org.debugroom.mynavi.sample.aws.microservice.common.model.UserResource;
import org.debugroom.mynavi.sample.aws.microservice.frontend.webapp.domain.repository.UserResourceRepository;
import org.debugroom.mynavi.sample.aws.microservice.frontend.webapp.domain.service.OrchestrationService;
import org.springframework.beans.factory.annotation.Autowired;
import org.springframework.context.MessageSource;
import org.springframework.security.core.GrantedAuthority;
import org.springframework.stereotype.Service;

import org.springframework.security.core.authority.AuthorityUtils;
import org.springframework.security.core.userdetails.UserDetails;
import org.springframework.security.core.userdetails.UserDetailsService;
import org.springframework.security.core.userdetails.UsernameNotFoundException;

import java.util.List;
import java.util.Locale;

@Service
public class CustomUserDetailsService implements UserDetailsService {

    @Autowired
    MessageSource messageSource;

    @Autowired
    OrchestrationService orchestrationService;

    @Override
    public UserDetails loadUserByUsername(String username) throws UsernameNotFoundException {
//        return CustomUserDetails.builder()
//                .authorities(AuthorityUtils.createAuthorityList("ROLE_USER"))
//                .build();
        try{
            UserResource userResource = orchestrationService.getUserResource(username);
            List<GrantedAuthority> authorities = null;
            if(userResource.isAdmin()){
                authorities = AuthorityUtils.createAuthorityList("ROLE_ADMIN", "ROLE_USER");
            }else {
                authorities = AuthorityUtils.createAuthorityList("ROLE_USER");
            }
            return CustomUserDetails.builder()
              .userResource(userResource)
              .authorities(authorities)
              .build();
        }catch (BusinessException e){
            throw new UsernameNotFoundException(messageSource.getMessage(
              "BE0001", null, Locale.getDefault()), e);
        }
    }

}
返却するCustomUserDetailsは下記の通り、UserResourceを内包して、IDとパスワードをUserResourceのプロパティから返却するよう実装を修正します。
package org.debugroom.mynavi.sample.aws.microservice.frontend.webapp.app.web.security;

// omit

public class CustomUserDetails implements UserDetails {

    private final UserResource userResource;
    private final Collection<GrantedAuthority> authorities;

    @Override
    public Collection<? extends GrantedAuthority> getAuthorities() {
        return authorities;
    }

    @Override
    public String getPassword() {
//        return "{noop}test";
        return userResource.getCredentialResources().stream()
          .filter(userResource -> Objects.equals(
                  "PASSWORD", userResource.getCredentialType()))
          .findFirst().get().getCredentialKey();
    }

    @Override
    public String getUsername() {
//        return "test";
        return userResource.getLoginId();
    }

    // omit
CustomUserDetailsはorg.springframework.security.core.annotation.AuthenticationPrincipalを使って、Controllerのメソッドの引数からも取得できます。 以下はUserResourceをモデルオブジェクトとしてViewへ渡す例です。
package org.debugroom.mynavi.sample.aws.microservice.frontend.webapp.app.web;

// omit

@Controller
public class SampleController {

    // omit

    @GetMapping(value= "/portal")
    public String portal(@AuthenticationPrincipal CustomUserDetails customUserDetails,
                   Model model, HttpSession httpSession){
        model.addAttribute("portalInformation",
          PortalInformation.builder()
                  .userResource(customUserDetails.getUserResource())
                  .build());

    // omit
また、CustomUserDetailsはorg.springframework.security.core.context.SecurityContextHolderを利用して、 アプリケーション内の任意の場所でorg.springframework.security.core.context.SecurityContextを経由して取得できます。 以下の例では、Controllerのディスパッチ処理が実行された後に、一律に実行されるHandlerInterceptorAdapterを利用して、CustomUserDetailsServiceで設定した権限に応じて使用可能なメニューをViewへ渡しています。
package org.debugroom.mynavi.sample.aws.microservice.frontend.webapp.app.web.interceptor;

// omit

import org.springframework.security.core.Authentication;
import org.springframework.security.core.authority.SimpleGrantedAuthority;
import org.springframework.security.core.context.SecurityContext;
import org.springframework.security.core.context.SecurityContextHolder;
import org.springframework.web.servlet.ModelAndView;
import org.springframework.web.servlet.handler.HandlerInterceptorAdapter;

import org.debugroom.mynavi.sample.aws.microservice.frontend.webapp.app.model.Menu;
import org.debugroom.mynavi.sample.aws.microservice.frontend.webapp.app.web.security.CustomUserDetails;

public class SetMenuInterceptor extends HandlerInterceptorAdapter {

    @Override
    public void postHandle(HttpServletRequest request,
                     HttpServletResponse response, Object handler,
                     ModelAndView modelAndView) throws Exception {
        if(Objects.nonNull(modelAndView)
          && Objects.isNull(modelAndView.getModel().get("menuList"))){
            SecurityContext securityContext = SecurityContextHolder.getContext();
            Authentication authentication = securityContext.getAuthentication();
            if(Objects.nonNull(authentication)){
                Object principal = authentication.getPrincipal();
                if(principal instanceof CustomUserDetails){
                    if(((CustomUserDetails) principal).getAuthorities()
                      .contains(new SimpleGrantedAuthority("ROLE_ADMIN"))){
                        modelAndView.addObject("menuList", getAdminMenuList());
                    }else {
                        modelAndView.addObject("menuList", getMenuList());
                    }
                }
            }
        }
    }

    private List<Menu> getAdminMenuList(){
        return Arrays.asList(Menu.PORTAL, Menu.LOGOUT, Menu.USER_MANAGEMENT);
    }

    private List<Menu> getMenuList(){
        return Arrays.asList(Menu.PORTAL, Menu.LOGOUT);
    }

}
メニューが表示されるよう、ThymeleafのHTMLテンプレートも修正します。
<!DOCTYPE html>
<html xmlns:th="http://www.thymeleaf.org">
<!-- omit -->
<body>
  <!-- インターセプタで設定したメニューのリストを表示 -->
  <div th:fragment="menu" th:remove="tag">
    <ul class="menu" th:each="menu, status: ${menuList}" >
      <li><a th:href="${menu.path}" th:text="${menu.name}"></a></li>
    </ul>
  </div>
</body>
</html>
<!DOCTYPE html>
<html xmlns:th="http://www.thymeleaf.org" th:fragment="layout (head, body)" lang="ja">
<!-- omit -->
<body>
  <div id="header" th:replace="~{fragments/header :: header}"></div>
  <article>
    <div id="flex-container">
    <!-- メニューのテンプレートを読み込み -->
      <div class="flex-item-1">
        <div id="menu" th:replace="~{fragments/menu :: menu}"></div>
      </div>
      <div class="flex-item-2">
        <div id="body" th:replace="${body}"></div>
      </div>
    </div>
    <div id="footer" th:replace="~{fragments/footer :: footer}"></div>
  </article>
</body>
</html>
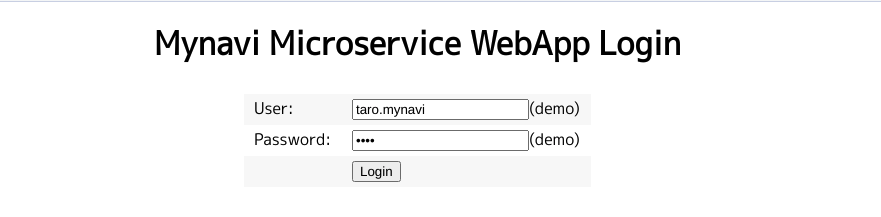
アプリケーションを起動し、ログインしなおします。バックエンドのマイクロサービスがアクセスするユーザデータの1つに設定したIDとパスワードは「taro.mynavi」と「test」です。
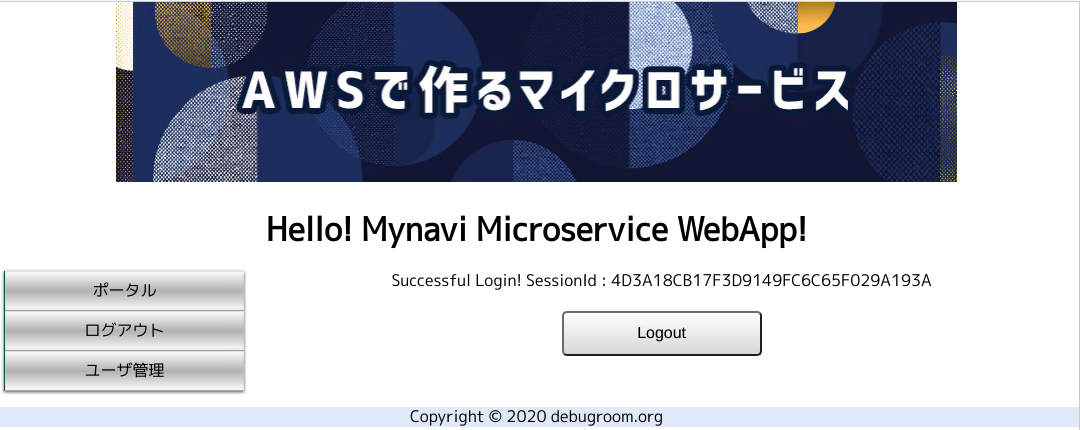
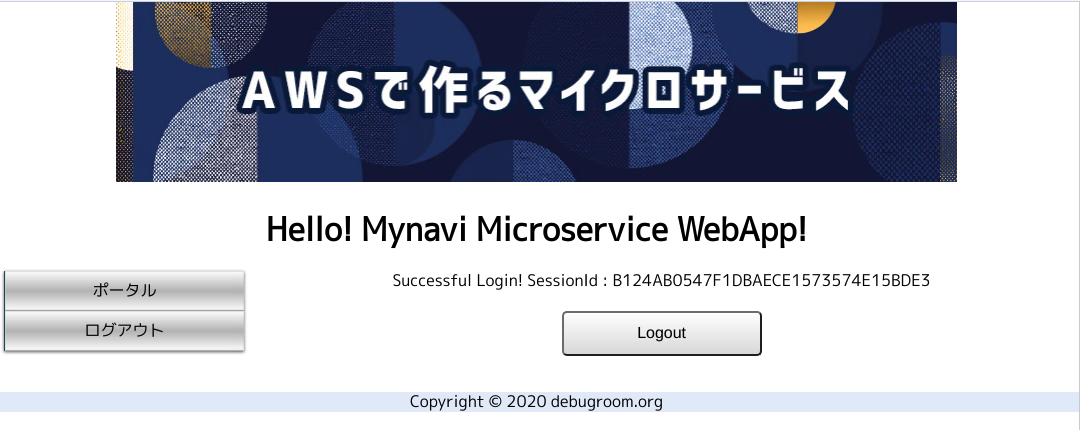
一度ログアウトして、今度は管理者権限を持たないユーザデータである「jiro.mynavi」と「test」でログインしてみましょう。今度は表示されるメニューが少なくなります。
注釈
Thymeleafは本稿の趣旨からは外れるため、説明の対象から除外していますが、SpringSecurityと連携して、ユーザの権限に応じて、コンテンツの表示非表示を制御する機能が提供されています。 詳細は Thymeleaf - Spring Security integration modules を参照してください。
今回はSpringSecutiyを使ったWebアプリケーションがバックエンドマイクロサービスから取得したUserResourceを使って、認証処理を行うように実装しなおしてみました。 次回以降は、AWS X-Rayを使って、これらのコンポーネント間の呼び出しを可視化する方法を紹介していきます。
著者紹介
川畑 光平(KAWABATA Kohei) - NTTデータ
金融機関システム業務アプリケーション開発・システム基盤担当、ソフトウェア開発自動化関連の研究開発を経て、デジタル技術関連の研究開発・推進に従事。
Red Hat Certified Engineer、Pivotal Certified Spring Professional、AWS Certified Solutions Architect Professional等の資格を持ち、アプリケーション基盤・クラウドなど様々な開発プロジェクト支援にも携わる。
AWS Top Engineers & Ambassadors 選出。
本連載記事の内容に対するご意見・ご質問は Facebook まで。